
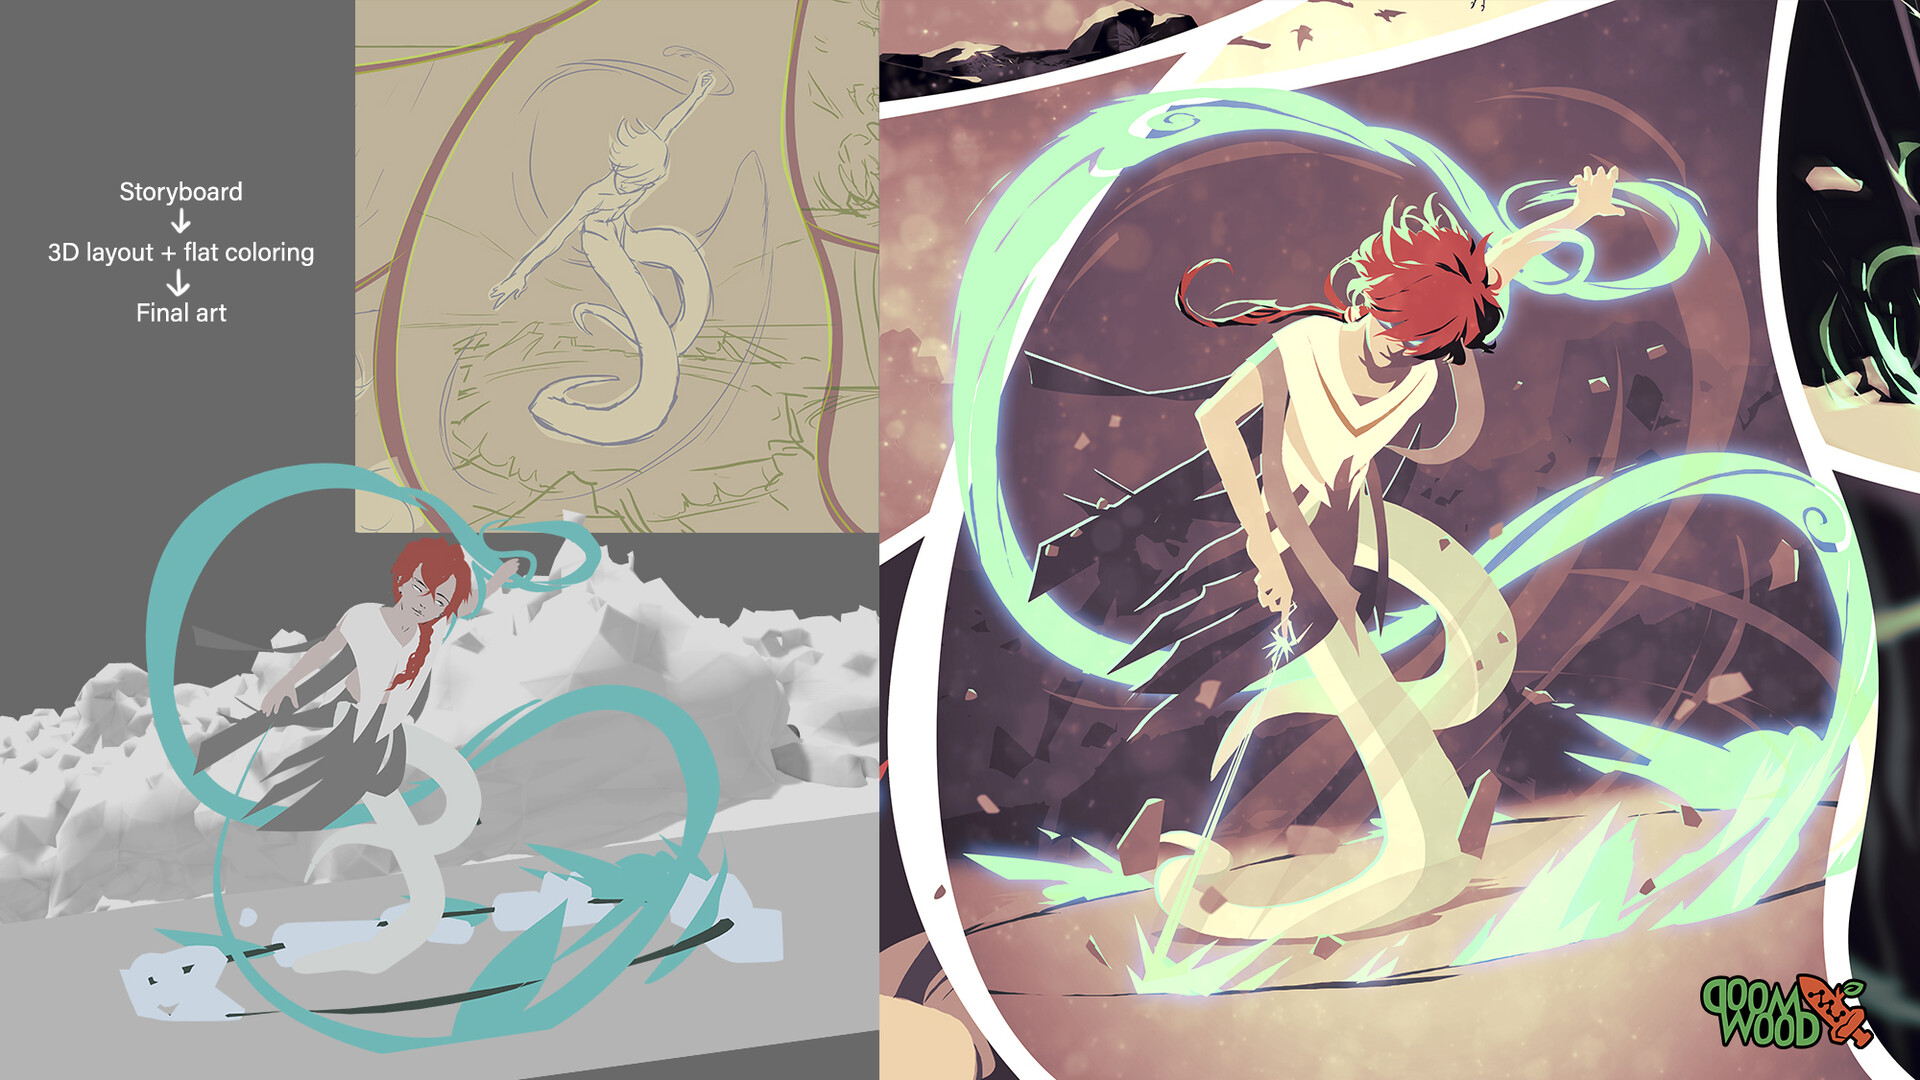
Overview
- Dive in the R&D phase again to explore options using apps in VR
- Step 1: Setting up the terrain
- Step 2: Prepare customized mannequin body parts
- Step 3: Import and setup the mannequin in Gravity Sketch
- Step 4: Pose the character
- Step 5: Adding clothes mesh
- Step 6: Paint in special effects using stocks
- Step 7: Taking screenshots with character and background separated
- Step 8: Compositing final shot in Photoshop
- Summary
Dive in the R&D phase again to explore options using apps in VR
After trying out Medium, Gravity Sketch, AnimVR, and Google Blocks, here's trimmed-down documentation on the thought process. Each app is designed to solve a different problem regarding using VR to paint or design in 3D; if you don't know any apps listed above, I suggest you look them up first just go get a basic idea of what they are
Step 1: Setting up the terrain
I found a fairly large lake terrain from SketchFeb, was surprised Gravity Sketch didn't chock after importing the asset. Seems like bigger assets only affects the importing and saving time. Then added a giant cube as the frozen lake with a few imported trees and rocks to dress up the scene
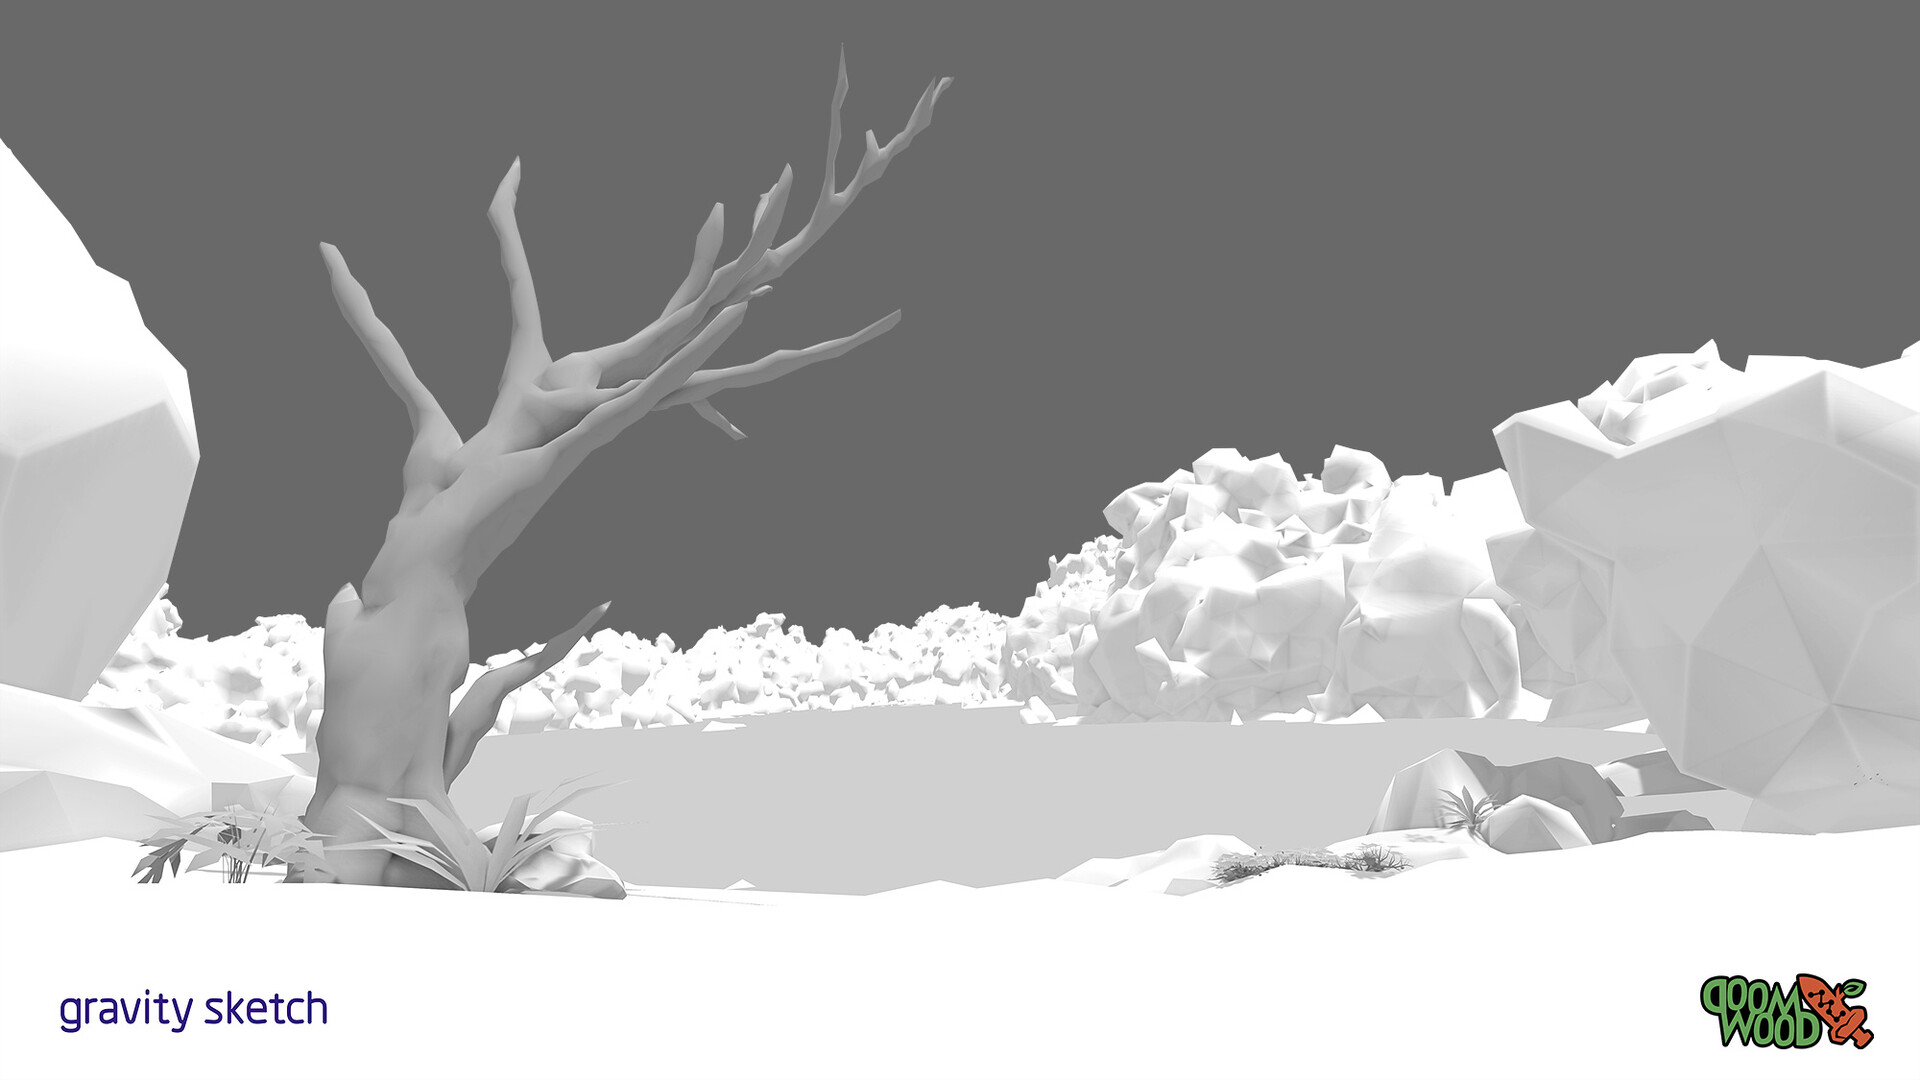
- Tip: Gravity Sketch only supports OBJ at the moment. You can convert any FBX model into OBJ and save it into to App's Import folder (in C:/Documents)
Step 2: Prepare customized mannequin body parts
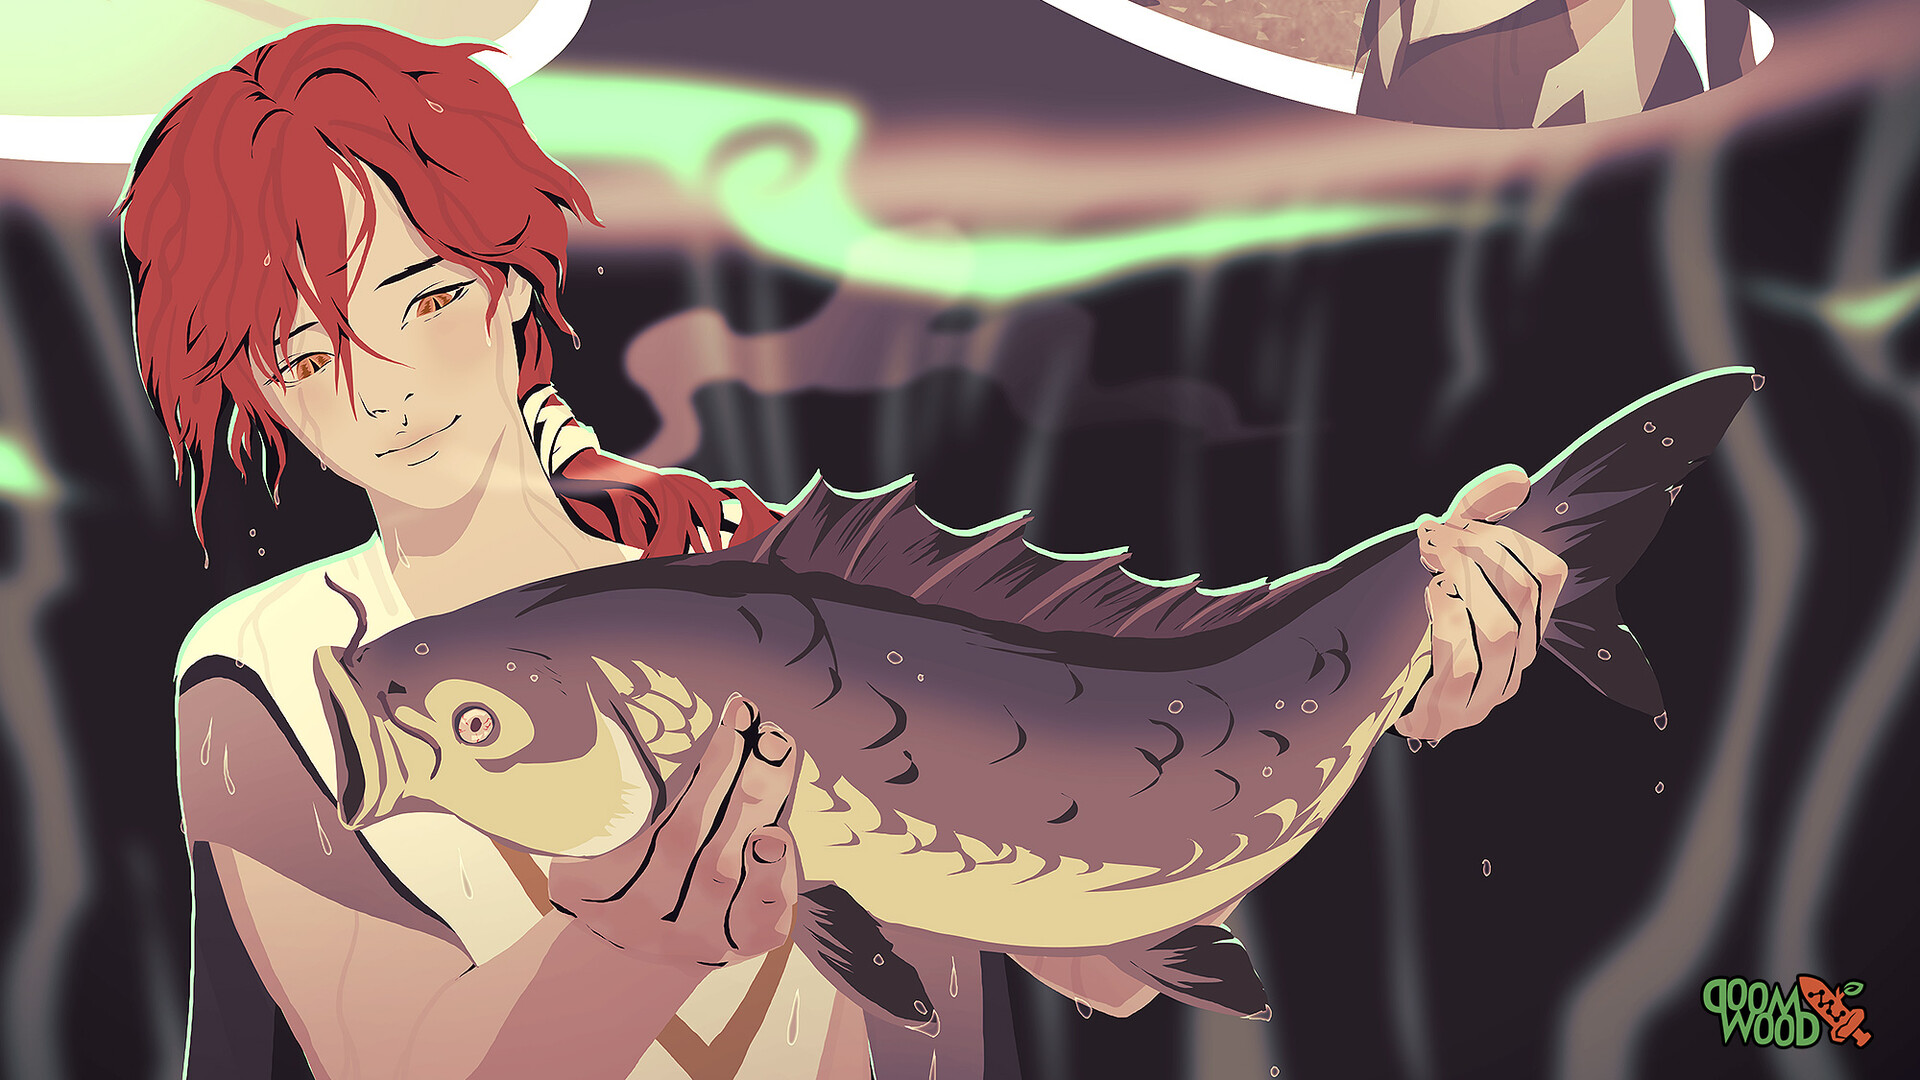
For this character - a 10 years old boy with serpent legs, I decided to model him using Medium
Medium provides an inventory of premade male and female body parts which helps speed up the modeling process
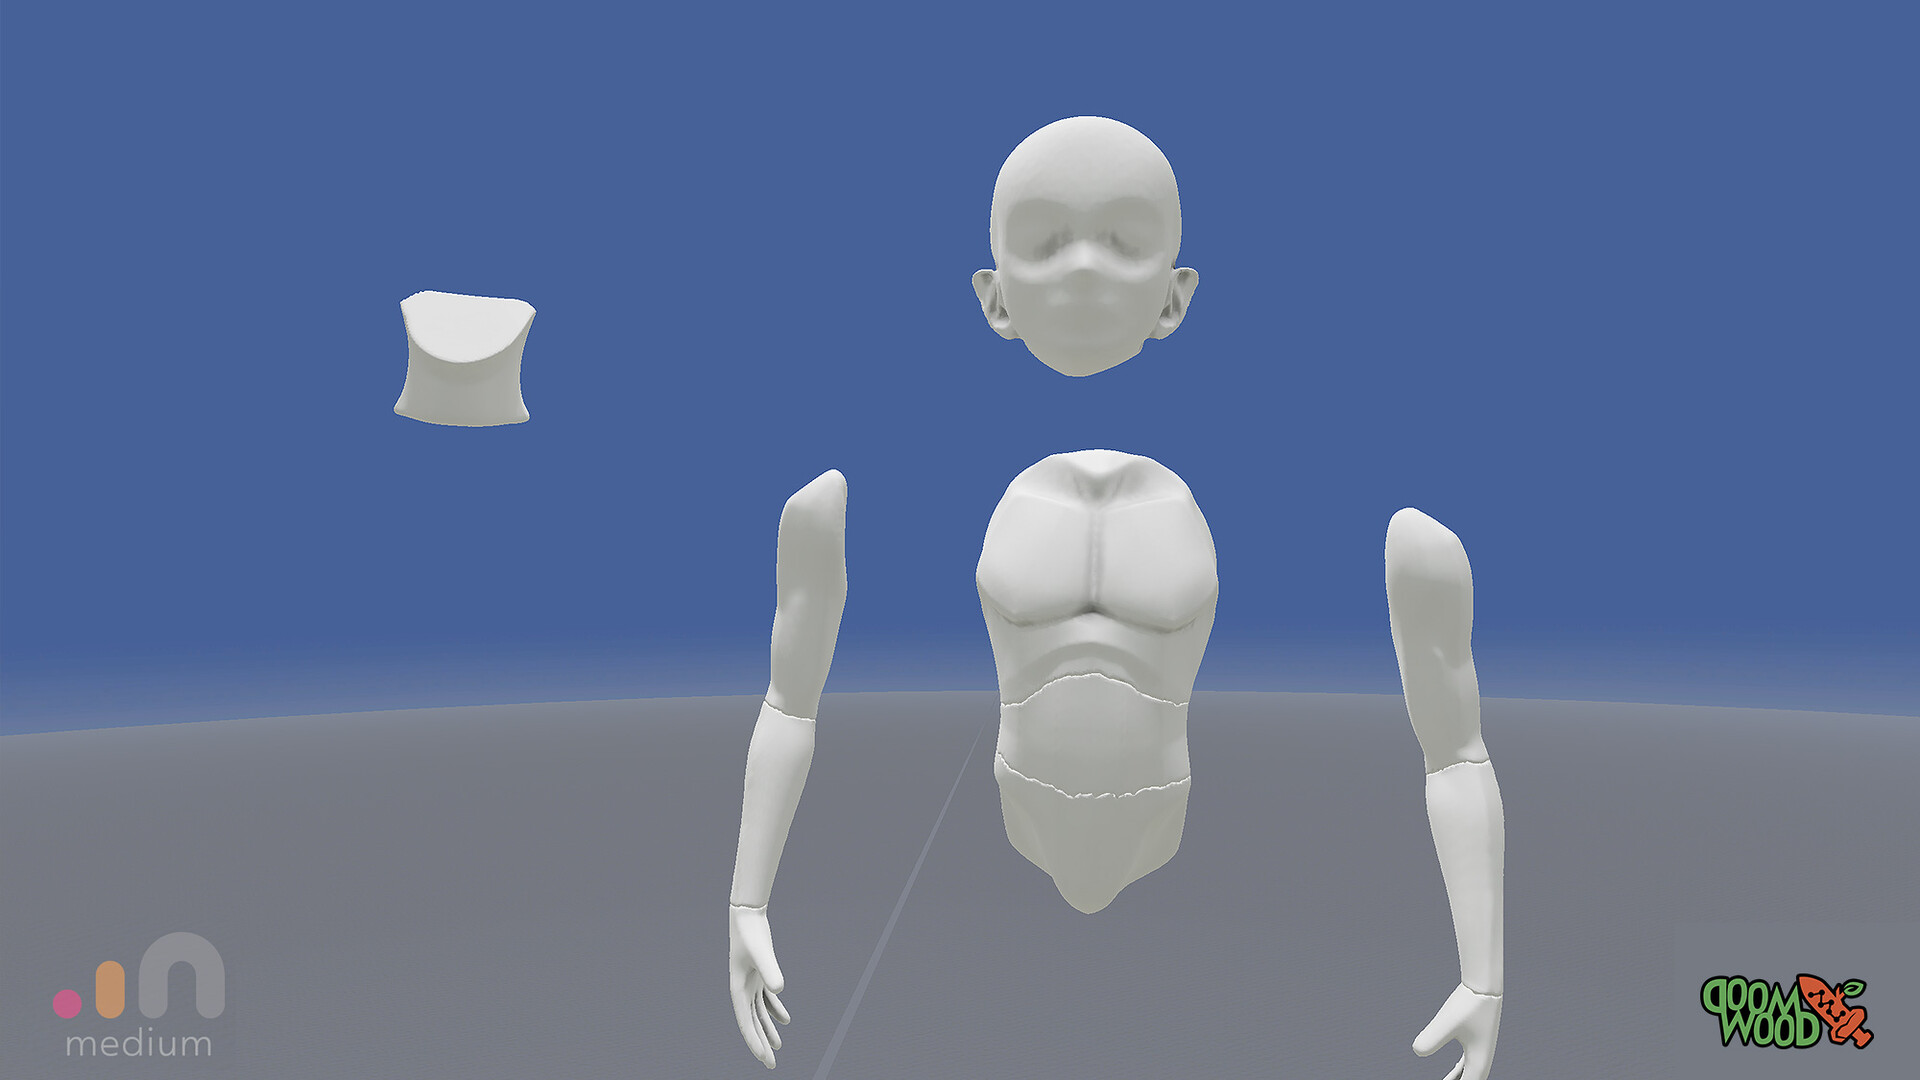
Adjusted body proportion on the premade body parts, then cut it up into sections

Spent about half an hour on modeling his head (with symmetry turned on) and hair
- Tip: AnimVR has a better line quality for making hairs. Found it's quite challenging to model solid forms like an arm or the torso. End up only use the hairs from AnimVR
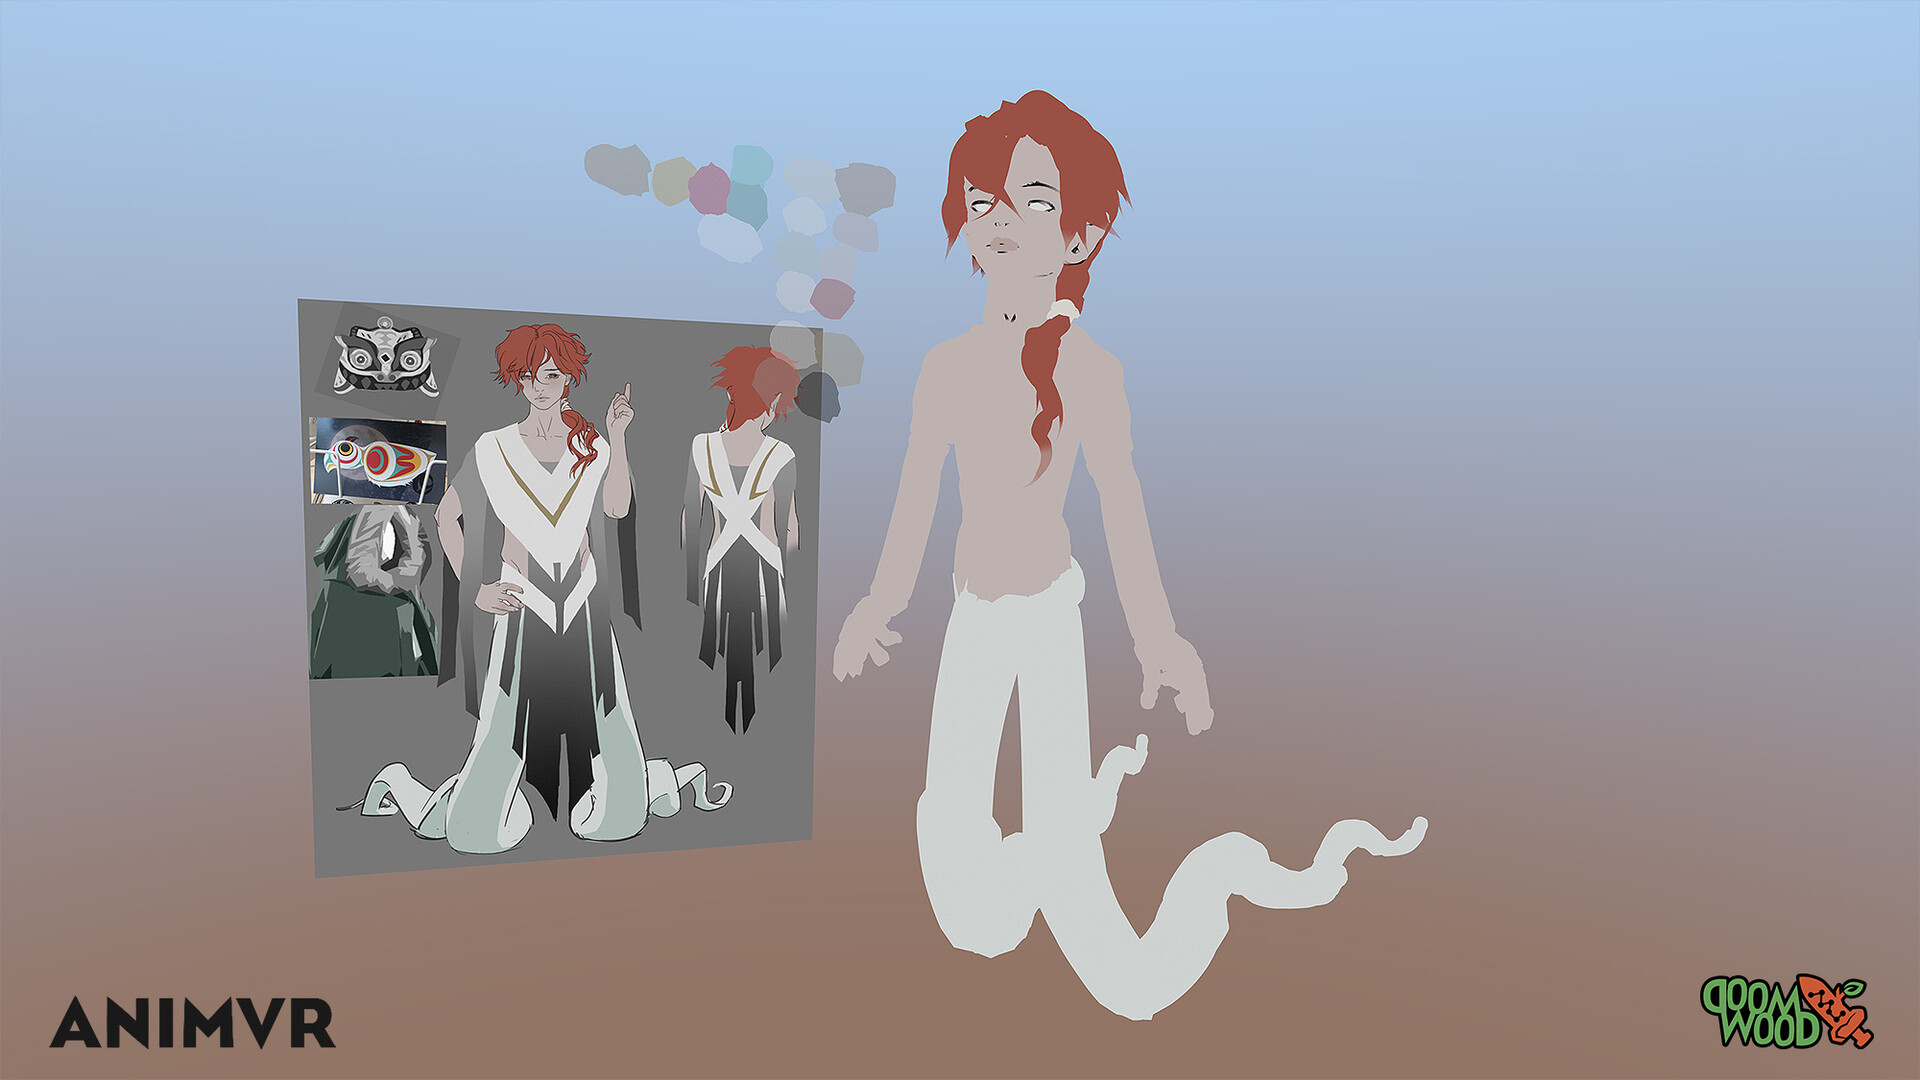
Workspace setup is heavily inspired by Thriller VR animation short. Check out the tutorial here:
https://gumroad.com/l/ThrillerVR
Gravity Sketch has a simple way to control curves. So I end up adding the serpent legs in Gravity sketch (Demo in the video)
Step 3: Import and setup the mannequin in Gravity Sketch
Gravity Sketch has an ungrouping function to explode an existing group. Though it will be good to import the character parts all together then explode them to individual parts to pose in Gravity Sketch
Turns out it works partially with the OBJ body parts exported directly from Medium. A big portion is still combined. Ended up using Blender 3D separate each body parts as objects and export them out together as one OBJ file for Gravity Sketch to work with.
- Tip: Gravity Sketch doesn't support sampling colors from image pixel at the moment. But you can import images and use as texture directly. To work around this, I prepared a few 10px x 10px square images with a filled with a flat color. It serves as my color swatches
Grab all parts sharing the same material and assign the same flat color texture for skin, hair and serpent legs (Demo in the video)
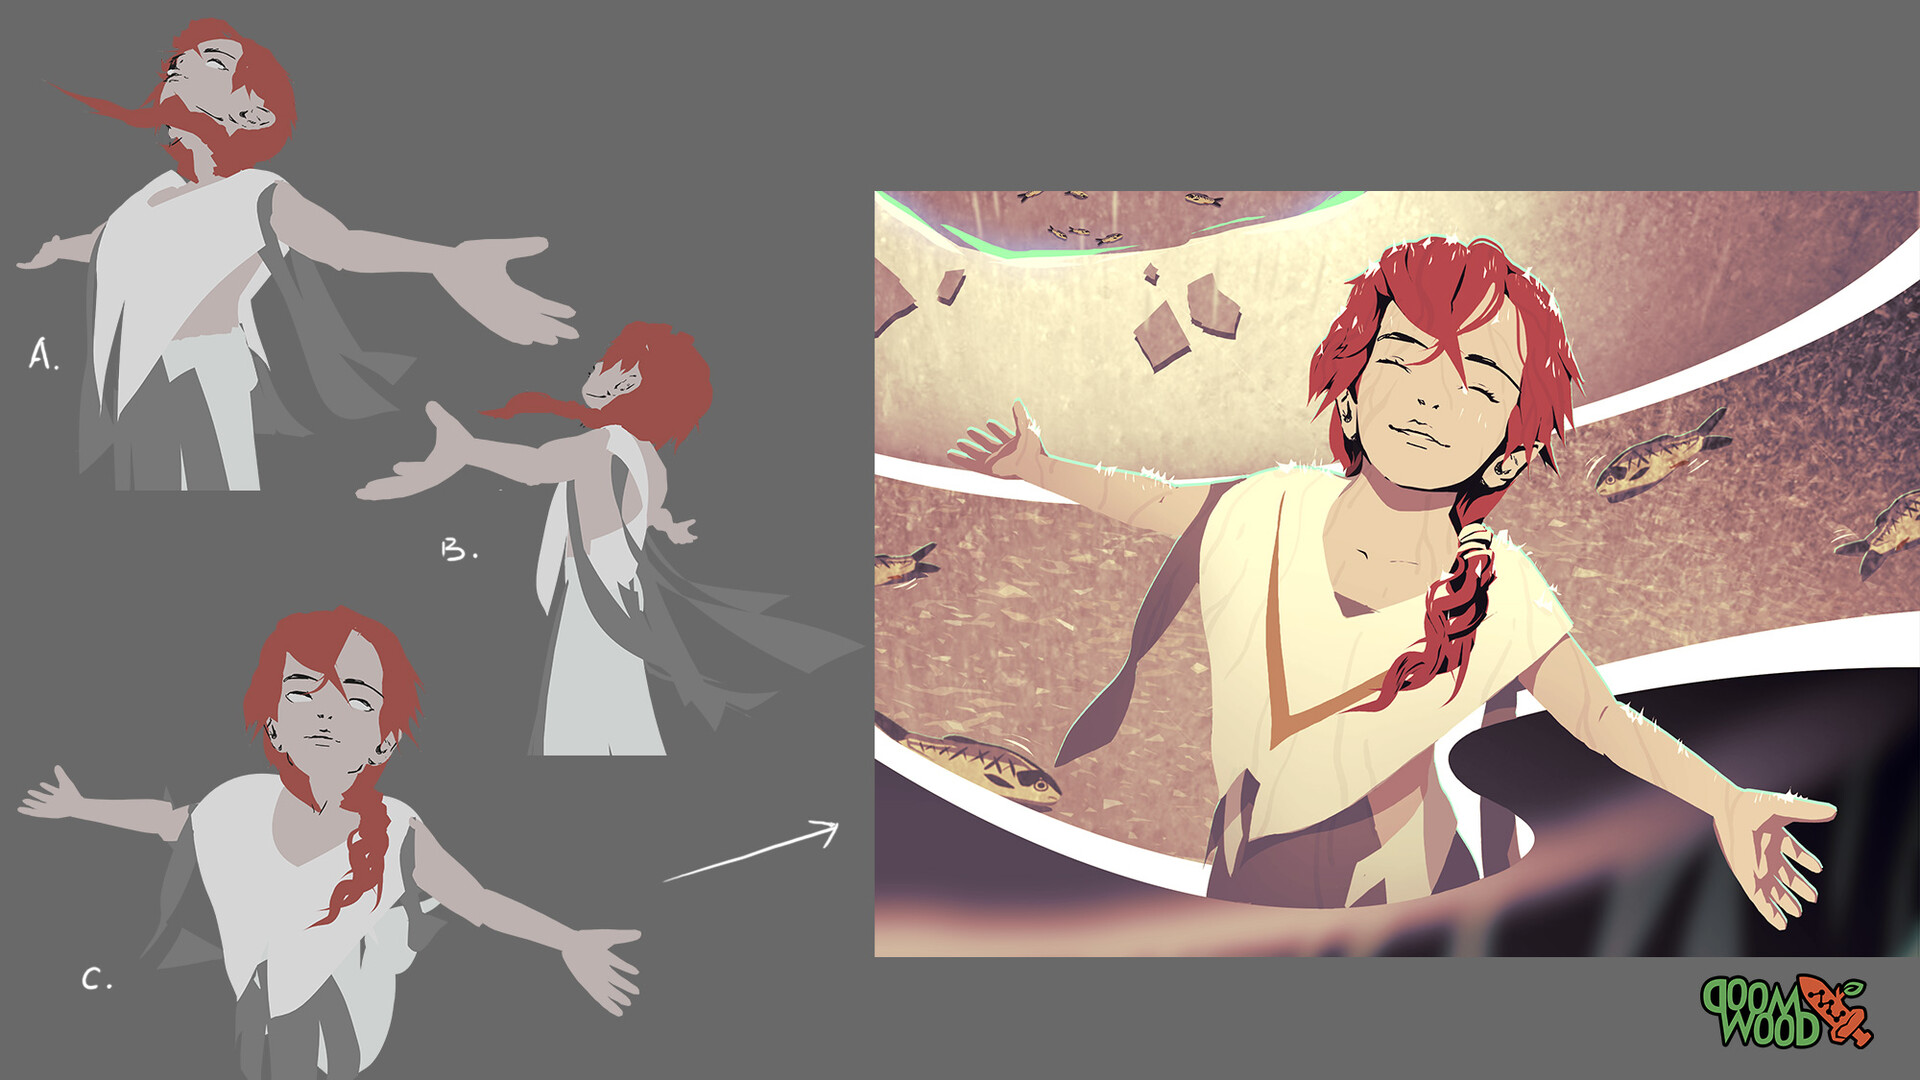
Step 4: Pose the character
This is definitely the fun part, feels like playing with a toy LEGO character where there's no Gravity in the way
- Tip: Increase the grabbing orb to grab multiple body parts altogether (Demo in the video)
Step 5: Adding clothes mesh
Another strength when using Gravity Sketch
- Tip: Draw two lines parallel each other, bridge the gap with a curved sheet, great for defining the form of the clothes (Demo in the video)
Step 6: Paint in special effects using strokes
Another fun part feels like Photoshop, but in 3D!
- Tip: Goes into the brush's control panel and play around with the shape of the stroke
Step 7: Taking screenshots with character and background separated
Gravity Sketch supports rendering shot as PNG with transparency. The capturing size is huge
5760px x 3240px (screen size) or 4096px x 4096 (square)
- Tip: Because the character is in a 3D environment, I find it's very easy to explore new camera angles and comp it into the comic page see if it works right away
Step 8: Compositing final shot in Photoshop
- Drag PNG files in as smart objects
- Fill in gaps and adjust shapes to make the pose more natural
- Adding adjustment layers to enhance the mood
Summary
If you are interested in exploring new techniques on how to make good art FAST, sketching in VR is the direction to go. It will still take a long time for any big-production to fully intergrade this new tech, but indie studios and small productions are already using it to speed things up
PROs
It is not only a big time saver for any pre-vis projects involving visual storytelling; but also allows you iterate fast before exporting to any major 3D software for final touch-up and rendering. After a while, you will also build up an asset library of re-usable character body types, background elements, and scenes which ultimately speed up the pre-production phase for any future projects
CONs
VR technology is still very new, crashes can happen from time to time. Some apps do not support importing FBX with a rigged character. And there are not much-established production pipeline to follow
Hope this post will help you in some way in establishing a production workflow for your next creative project ^_^